When the Material Pushes Back: Teaching Tooling Through 3D Printed Moulds
This project came from a simple teaching question: how can students really understand moulding and manufacturing without only seeing it as a diagram, process chart or lecture slide?
For Year 3 Product Design students, I wanted to design a project that connected digital modelling, 3D printing, casting and material testing in a practical way. The aim was not just to produce a finished object, but to help students understand how design decisions affect the way something can actually be made.
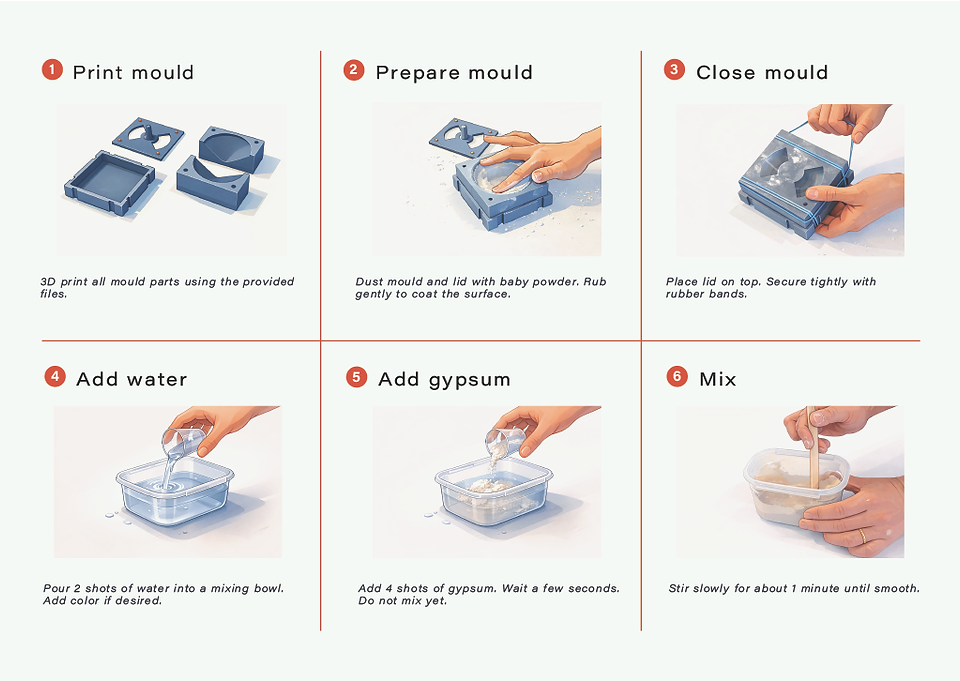
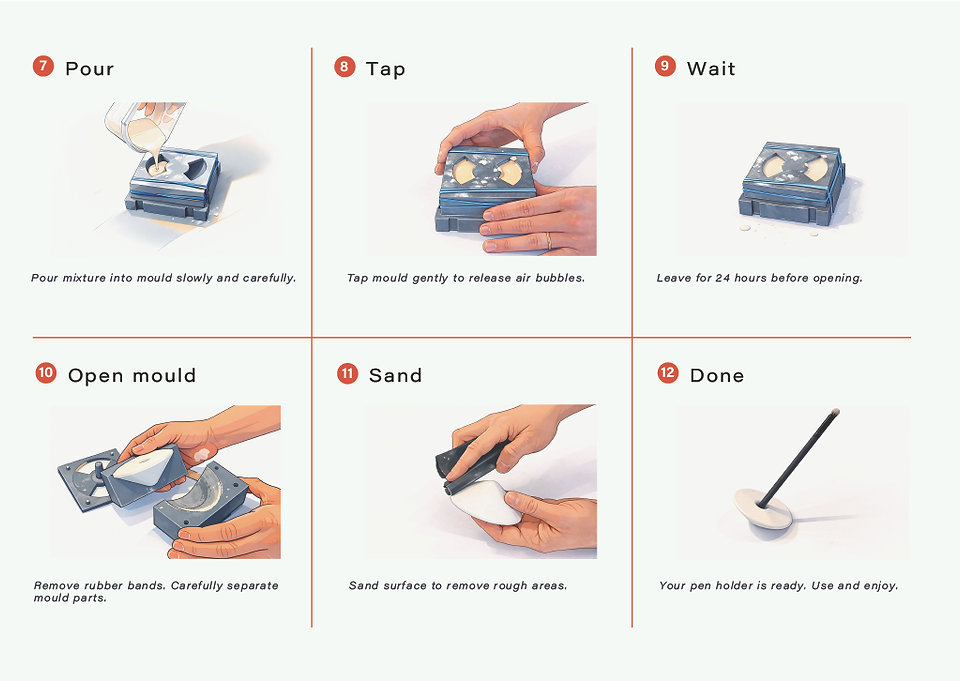
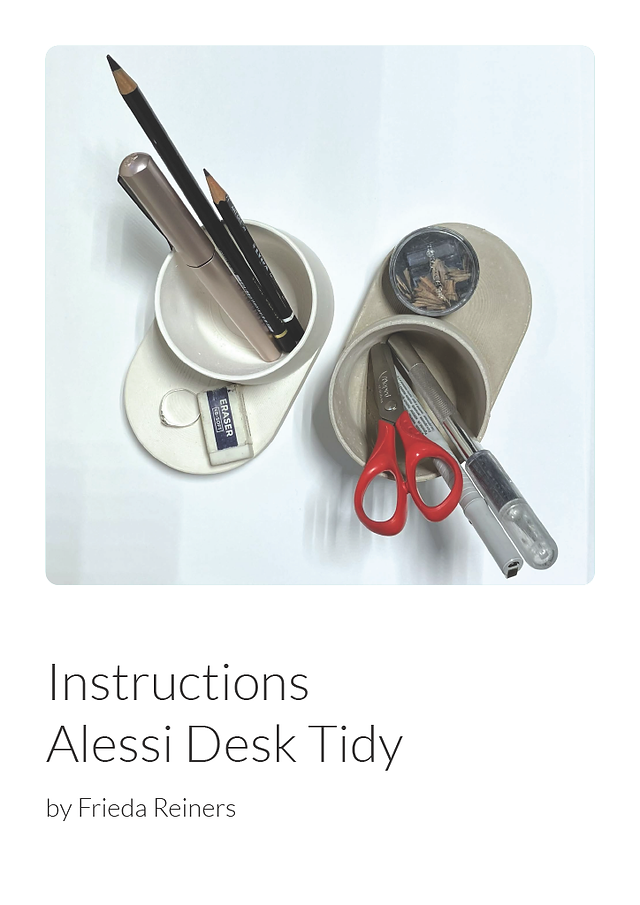
The brief asked students to design and cast a one-off gypsum desk tidy, while also developing an open-source 3D printed mould system that someone else could use to reproduce the design. In that sense, students were not only designing the object. They were designing the making kit around it.
Designing the Object and the System
The project was framed around two connected challenges: the desk tidy itself, and the mould system needed to make it. Students had to think about form, function, detail and finish, but also about assembly, disassembly, repeatability, alignment, pouring, release and documentation.
This was important because a mould is not just a container for material. It is a tool. If it is difficult to assemble dry, it will be worse when it is full of wet gypsum. If the part has no draft, it will stick. If the geometry creates an undercut, the cast may be trapped. If the mould is not aligned properly, the result will show it. These were not abstract lessons. They became real very quickly.
Learning Through Failure
One of the most valuable parts of the project was that the feedback was immediate. Students could see where a mould leaked, where air was trapped, where a part cracked, where the surface finish picked up the 3D print lines, or where a design simply would not release. The material pushed back.
That kind of feedback is hard to replace. It moved the learning beyond terminology and into experience. Draft angles, wall thickness, part lines, tolerances, fillets, release agents and curing times became things students had to deal with, not just things they had to define.
The strongest projects showed clear loops between CAD, 3D printing, casting, testing and refinement. Students were learning how to use failure properly: not as the end of a process, but as evidence for the next decision.
3D Printing as Tooling
This project also positioned 3D printing as more than a way to make prototypes. Here, the printed parts became tooling. They had to be strong enough, accurate enough and clear enough to support a repeatable casting process.
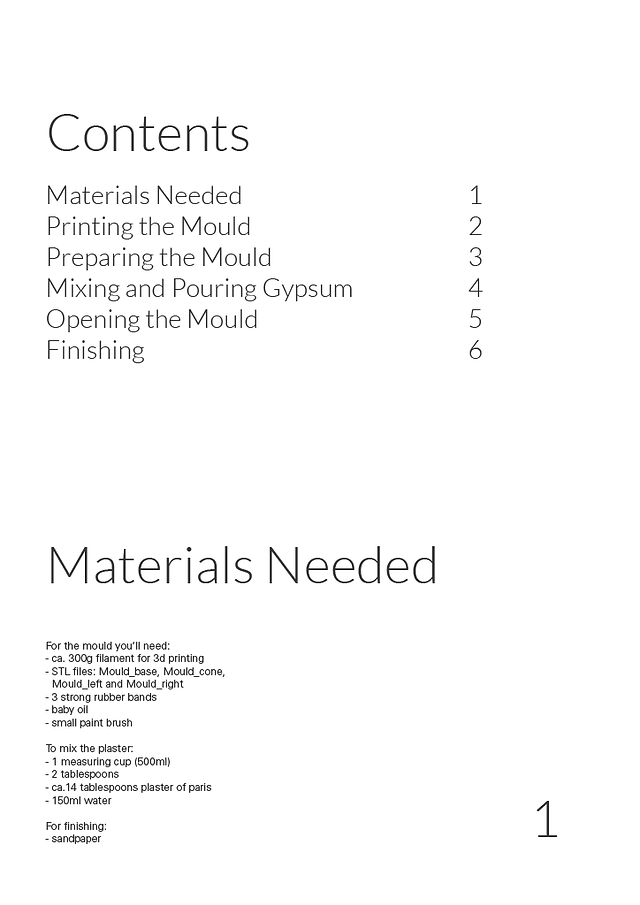
Students had to consider print orientation, wall thickness, layer lines, assembly features, clearances and how the mould would be used by someone else. The brief asked them to produce STL files, exploded views, print settings, casting steps, demoulding instructions and basic finishing guidance. That shifted the focus from making something once to communicating a process that others could follow.
This was one of the most useful learning points in the project. A successful outcome was not just a clean cast. It was a system that could print easily, assemble cleanly, pour cleanly and release cleanly.
Making For Makers
The open-source aspect gave the project a wider purpose. The final designs were intended for sharing through the SETU Design MakerWorld page, with a future link to Kilkenny Library Makerspace where members of the public could download and produce the work themselves.
That changed the nature of the project. Students had to think about a maker they might never meet. Could that person understand the parts? Could they assemble the mould correctly? Could they mix, pour and demould safely? Could they finish the object without needing the student beside them?
This is where many of the deeper design lessons emerged. The class feedback showed strong development in iterative design, technical capability and material understanding, but also identified maker documentation as a key area for improvement. In many cases, students had made good work, but had not yet fully explained it in a way that a non-expert could confidently follow.
That is a valuable lesson in itself. Design does not end when the object is made. It continues through the instructions, the handover, the experience of use and the ability of someone else to repeat the process.
Why This Matters
For me, the value of the project was in the connection between making and understanding. Students were designing, printing, casting, breaking, adjusting, documenting and trying again.
They were also developing ownership. The self-assessment guide asked them to reflect on whether they moved quickly into testing, used failure to improve their work, designed for repeatability, and created documentation that a non-expert could use. These are the kinds of questions that help students move from completing a brief to developing as designers.
A good part is not just a good idea or a good CAD model. It is something that understands material, process, tooling, user and context.
This project was a small but meaningful way of helping students see that relationship for themselves. It brought together digital tools and messy material reality, and reminded us that some of the best learning happens when the mould does not open, the cast does not release, or the material refuses to behave exactly as planned.
That is where the design work starts.






Comments